Showing posts with label Tutorials. Show all posts

Tuesday, April 30, 2013

What Embarrassment, Green Living, and Produce Bags Have in Common


I'm embarrassed.

For more reasons than one.

First, my latest blog post was titled "Merry Christmas". And to make matters worse. . . it is dated December 25, 2011.

Shame.

I apologize to you, my readers. All 32 of you. I know you've lost sleep just waiting for my next post since the holiday season of 2011. Forgive me?

The second reason I'm embarrassed? Well, it all started a few months ago when my Bible study group opened the pages of this book that pretty much destroyed my life. In a good way. In an eye-opening way.

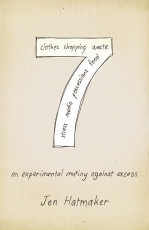
The book? "Seven" by Jen Hatmaker. Disclaimer: If you are oh-so-comfy with your modern conveniences don't even lay eyes on this book. You have been warned.

But, honestly, I'm so glad I did. Because now I'm different. Different in a way that makes me more grateful for the things with which I've been blessed. And the word that keeps coming to mind as I continue this journey toward living a life free of excess is "awareness". I'm more aware of the waste I produce. I'm more aware of how my decisions regarding the excess in my life has a ripple affect in my community and beyond. Awareness is all well and good, but it doesn't make things happen. For real change to happen, action must occur.  

Change. *shudder* I know, it's a dirty word. But positive change can help you to live a victorious life and motivate you to make a difference. Yes, ONE person can make a difference. Guess what happens when one person makes wise decisions and influences another to do the same? A snowball effect. I've never been a mathematical genius, but 1 + 1 + 1 + 1 and on, and on = A LOT of change! Yes, I have mad math skills--even without a calculator. Don't be jealous.

Okay, so back to the second reason I'm embarrassed. I can't shake the reality of the enormous excess in my life. The crazy ideas that I have held on to regarding my "needs". Jen Hatmaker talks about how our society has created these silly "needs" in our lives. Do bleach pens ring a bell? Do these types of things provide conveniences of sorts? Absolutely. Don't get me wrong--I love me some Mr. Clean Magic Erasers. These types of products are convenient, but at what cost? So, that being said, I'm embarrassed that I have been clinging to unnecessary stuff for so long. I'm embarrassed that I am a part of the top percentage of wealth in the world who uses up the largest percentage of the earth's resources. I'm embarrassed that I didn't take off the blinders and do something about it sooner. 

But the past is behind me and my future will be different.

So, I'm on a quest to make a difference. A quest to be more resourceful, content, thankful, and giving. While I still intend to enjoy God's blessings in my life, I am vowing to no longer abuse them.

But I believe in baby steps. I want to throw this whole get-rid-of-excess thing up against the wall and for it to stick, so I'm gonna eat this elephant one bite at a time. Yum.

Which leads me to my latest excess-related, conviction-inducing experience:

I was grocery shopping yesterday and purchasing quite a bit of produce. I was all proud of myself thinking, “Heck, yeah, (insert hair flip here) I am so healthy, green, ______, and ________ (fill in the blanks with any green movement-related buzz words you like. Then I saw them. You know, those metal-thingys that hold the unending rolls of *gasp* thin-plastic-one-time-use-then-throw-them-away produce bags. The sight of these contraptions had never caused me to feel such a weird sense of guilt laced with nausea before. I’m pretty sure the lady standing next to me caught me staring at the bags as if they were a giant hairy spider. Just to be clear, and I am not implying that you are the scum of the earth for using these bags. What I am saying is that, for the first time, I personally felt convicted for using these bags. So, when I got home I began searching for a cheap, resourceful way to end my unrelenting use of the dreaded plastic produce bags. And here’s what I came up with:

 I want to give credit where credit is due. I didn't invent this idea, but I was inspired by a couple of other blogs that have great tutorials for making similar bags. They rock my face off. You can find them here and here.


Back to the bags. Let's make one, shall we?

 Okay, you will need a t-shirt of some sort for this project. I used a tank top, but you can use a plain old t-shirt from your hubby's closet. Just make sure it doesn't have pit stains. Eww. I rescued this shirt from the pile of clothes I had collected (from closet purging--another post in itself) to donate to Goodwill.

If you are not using a t-shirt with sleeves (like me), you will need another t-shirt to make the drawstring bottom of the bag. If you are using shirt with sleeves, cut the sleeves off of the shirt, following the seams. Then lay the sleeves flat and cut 6 1" strips of fabric from the sleeves (3 from each sleeve). You will have 6 "circles" of fabric when you are done. Then cut open the circles at their seams and stretch them to produce 6 long strips of material. If you are using a regular t-shirt, cut the neck out of the shirt by cutting along the seam of the neckline. You can make this opening as big or as small as you like. Whatever floats your boat. I skipped this step because I dig the braided look of my shirt's neckline.

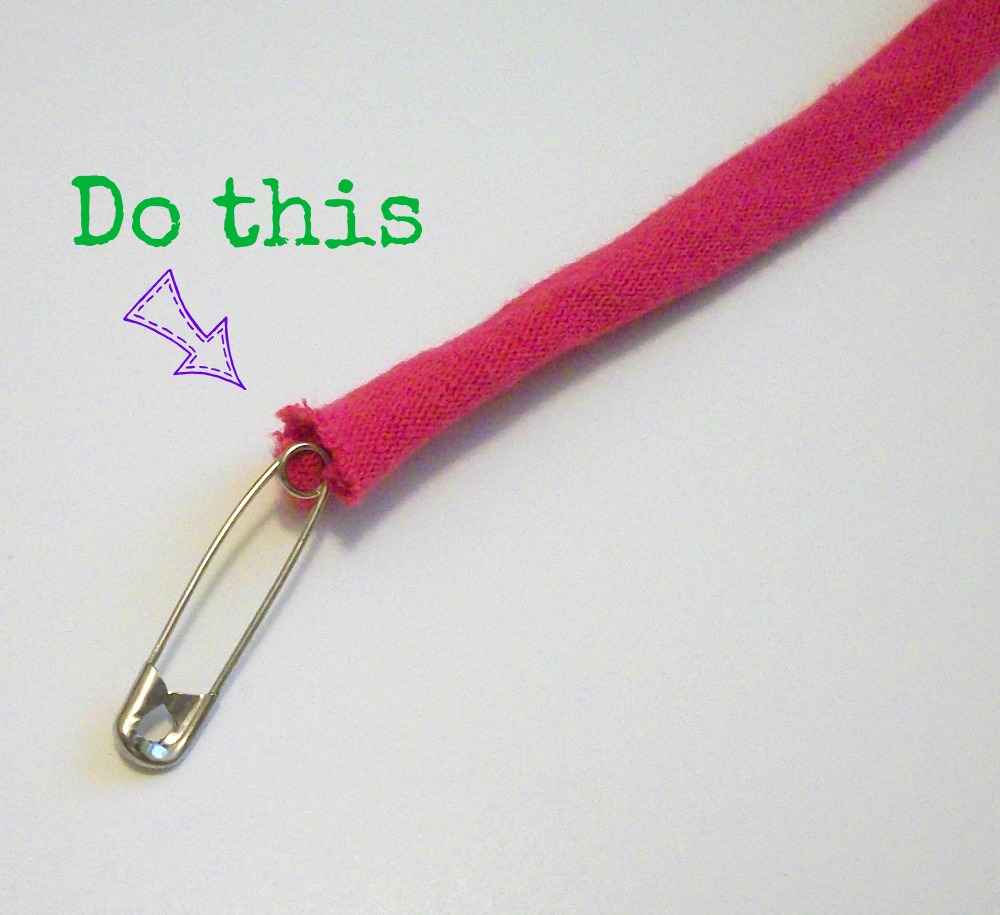
As you can see below, I used a hot pink fabric strips to coordinate with my turquoise tank top. Next, attach a safety pin to the end of one of your fabric strips. Do it.

Moving on.

 Here's where it gets a little tricky, but you can do it. I believe in you. Cut slits in the hem of your shirt as shown above. I'm not sure why the slit that is supposed to be on the left side of the shirt isn't there. It's a phantom slit. Spooky. Btw, these slits don't have to be perfect. We don't do perfect around here. Can I get an "amen"?

 Okay, let's get to threading. Thread your pieces using your handy dandy safety pin as the threading tool, as shown above. If you get super frustrated with this step and feel your blood pressure rising, I suppose you could always cut a longer strip of fabric and thread one piece through the entire hem. You just won't get the cute "fringe" look that we're going for. But, if that's how you roll, I won't judge.

 Okay, start cinching up your fabric by pulling the strings and the fabric around the hem. You may have to play with this a little. Once you're liking how it looks, tie knots to secure the fabric. If you haven't figured it out yet, we are going for a drawstring-like effect. Your creation should resemble a squid at this point. But a cute, colorful, fashion-forward squid. Go ahead and trim your fringe to the length you like.

 I just realized that I have scraps! Save them, people! I'm sure I'll find some use for them. . .


 Alrighty. I wanted to test my bag for its how-much-produce-will-it-hold capability. Don't want to fill my bag at the grocery store only to have my roma tomatoes falling out of the bag, rolling past the organic food aisle, causing someone to slip, thus triggering a massive grocery cart pileup that makes national news. Yes, I may be exaggerating the outcome of a faulty produce bag a teensy bit, but, hey, it could happen. Clean up on aisle 9. . .

The good news is that my bag holds a lot of produce! Booyah. The bad news is that this picture reminds me of how my backside probably looks in spandex pants during Zumba class. . . like two cats fighting under a rug. Sheesh.


 Remember those scraps? I found a use for them. Embellishments make me happy.


Here's how the finished bag looks. Pretty cute, eh? A lot cuter (and greener) than those plastic ones! So, get your craft on and make one of these bad boys!

Sure, using produce bags instead of plastic ones is a small thing. And yes, I've got a lot to learn and a long way to go on my "Seven" journey. But I'm taking the steps. I'm initiating change. I'm doing it. I want to thank God for the blessings He gives by taking care of what He has entrusted to me.

By the way, I highly recommend "Seven" by Jen Hatmaker. She is an excellent author who delivers an amazing message regarding the excess that is so prevalent in our country and how we can overcome the madness. Ready for positive change? Get the book. Right now. You can get it here.



Friday, December 9, 2011

Jazz UP a Soap Dispenser!

I suffer from the curse of the soap dispenser.


You know, the curse that involves one purchasing a gazillion pretty soap dispensers only to find none of the pumps work?


That "one" would be me.


I have a graveyard of beautimous dispensers in my bathroom cabinet.


And do ya think any of 'em work?


Nope.


So I surrendered to the cheapo-looking ones the soap actually comes in.


'Cuz at least they work.


But it just went against my grain.


So I came up with a solution:


Here's how I did it. . .


I gathered my supplies. In addition to the supplies pictured you will need some ribbon, green felt, a hot glue gun and glue sticks, three red beads, and a cute puppy.


Cut a large square of fabric big enough that it comes up at least to the top of the pump when you pull it up on all sides.


Find a cutie patootie puppy to help you tie up the fabric around the soap dispenser.


Cut off the excess fabric using good scissors. Not those sorry ones you use to cut everything from duct tape to floral wire. You know you have some.


Finish it off by tying it up with a pretty ribbon. I cut out a holly leaf from green felt, glued on three red beads, and glued the whole thing to the dispenser with hot glue. Booyah! No more staring at an ugly soap dispenser!


Tuesday, November 22, 2011

Fluffy Pumpkin Cheesecake {Make It, Why Dontcha?}

Pin It


It's nutty.


It's crazy.


It's almost here.


THANKSGIVING!!!!!


Okay, wasn't I just scrambling around to put the finishing touches on my Thanksgiving recipes and rushing to get to Grams' house on time last year???? What the what??


If you're like me, you wait to the last minute to do most things.


Look up "procrastination" in the dictionary and there I'll be.


But, I hope you're sitting down, I am ready for Thanksgiving this year!


Yep, a whole whopping 2 days early!! I'm also almost done with my Christmas gifts. I just need to get them wrapped, but that's a different story. . .


Anyway.


Actually, the hubs and I had Thanksgiving this weekend with his side of the fam and we'll spend Thanksgiving day with my crazy side.


I made a couple of dishes this weekend, so I thought I'd share one of my favs with you:
Fluffy Pumpkin Cheesecake!


It's so good and it's so easy!


The recipe comes from this book, which is chock-full of easy-to-do recipes:


I highly recommend it!


Alrighty, let's get movin' with the recipe!


1 package *8 oz) cream cheese, softened
1 canned pumpkin
1/2 cup sugar
1/2 teaspoon pumpkin pie spice
1 tub (8 oz) whipped topping, thawed
1 prepared graham cracker crust (6 oz or 9 in)
(I make my own crust because it's cheaper, but a prepared one can save time. Your call.)

Beat cream cheese, pumpkin, sugar and pumpkin pie spice in large bowl with wire whisk or electric mixer on high speed until smooth. Gently stir in whipped topping. Spoon into crust.

Refrigerate 3 hours or until set. Garnish with additional whipped topping.


I garnished my pie with pecans since my wonderful grandparents gave me about 5 lbs of them from their pecan tree! This pie definitely needs some sort of decoration because, on its own, it's rather bland looking. As in, "ewww, that-looks-gross-I'm-not-eating-that" kind of bland looking. The cookbook suggests garnishing with sliced kiwi and curled orange peel. You can also sprinkle the pie with ground cinnamon. Store the remaining cheesecake (if there is any!) in the fridge. Yum!


Wednesday, October 19, 2011

Anthro Lamp Shade Knockoff

Pin It


I'm completely obsessed with everything Anthropologie.

I love to walk through Anthro stores and wipe my chin as I gawk at their awesomeness.

Oh, and then there's the part when I pass out after peeking at their price tags.


I'm especially drawn to their nifty home decor--specifically, their lighting. So I thought I'd attempt to replicate one of their lamp shades.

So, let's shed some light on the subject, shall we?

Here's Anthro's version:

Yep, for $88.00 this lovely shade can be yours. . . or you can follow my tutorial and make one for next to nothin'. I thought you'd be interested. Read on, friends. Read on.


Oh, before we get started, here's how the lamp looked before its "Anthrozation." I think I paid about $3 for it (lamp and shade) at a thrift store. Not too shabby, eh?


Now, find some awesome fabric that you want to use to cover the shade. Almost any fabric will do. Just keep in mind that the color of the shade will likely show through your fabric. I actually used a sheer curtain panel from a thrift store. Price? $1. Holla. Cut the fabric into strips. I cut as many bad boys as I could get out of my curtain panel. 

Now get out your handy dandy glue gun . . .

. . . and glue one end of the fabric strip down on the inside of the shade as pictured above. Get it? Got it? Good. Movin' on.


Bunch your fabric and glue down in a random ruffle pattern. The beauty in this project is that you really can't mess it up! Ruffle away, peeps!

Keep moving vertically with this pattern until you cover the entire shade. 


And your finished product should look something like this:


Booyah, Anthro!


Tuesday, July 5, 2011

Distressin' Out {DIY Distressed Denim}

Pin It


What's up, everyone? As you may have noticed, I've been away from the blog lately. Did ya miss me? Did ya, did ya? The children's ministry stuff going on at church was eating up most of my usual blogging time (which is cool 'cuz I love my kids at church), but I have now officially landed in take-a-moment-to-breathe land. Wanna join me? I have a new project to share with you today! I'm lovin' the distressed denim look, but what I'm not lovin' is the crazy price tags lots of stores slap on jeans that look like they've been run over by a semi after being thrown in a muddy ditch and drug through barbed wire. Kind of like these:


I own tons of blue denim, but I'm kinda diggin' the latest colored denim trend. Again, colored distressed denim + hefty price tag = unhappy wannabe fashionista on a budget. What's a girl to do? Well, make some distressed denim of her own, of course! Here's how:


Here's the scoop. These bad boys came from a thrift store. Yep, served up a whole buck for 'em. Can I get a holla? This picture is kind of creepin' me out 'cuz it reminds a little bit of a crime scene. Movin' on.


Grab a pair of shorts that are the length that you like to use as a pattern for your new threads.


Okay, I'm feelin' the need for some random cuteness.


WARNING:
The following image may cause individuals to compulsively say "awwwww" while simultaneously sighing.


Told ya! Okay, back to business!


Cut the legs off of your pants. Sounds a little painful, eh?


Remember that I said you'll need your pent-up aggressions for this project? Well, now is the time to whip 'em out. Use 'em to distress and de-stress, my friends. Remember to breathe.


FYI: I used my nifty xacto knife to do some of the distressing.


Related Posts Plugin for WordPress, Blogger...